Workflow management is the process of building, tracking, and improving your approach to your team’s repeatable tasks. When you get your workflow management system right, you gain:
- Clarity, with specific goals, a well-defined system, and a record of every task that needs to be completed
- Transparency, with a bird’s-eye view of your work and the granular data you need
- Accountability, with clear task ownership and a fixed approval process
- Consistency, as all the work you produce passes through the same, well-honed steps before it’s marked complete.
Here, we’ll examine the manager’s role at every stage of a typical workflow, the pitfalls to avoid, and the ways workflow management software can keep you on track.
With the right setup, you can manage your tasks more efficiently, boost collaboration in your team, and continually improve your process as you learn more. That’s why we’ll also focus on the features of our work management platform, Wrike, used by global brands like Siemens Smart Infrastructure, Nickelodeon, and Fitbit to handle workflow management from ideation to approval.
Wrike is the only tool you need to create seamless, automated workflows for your entire team. As organizations grow, siloed processes become a major challenge. Wrike helps break down these barriers, enabling cross-functional collaboration and creating a single source of truth for all your workflows.
3 steps to effective workflow management
Every workflow has distinct stages that take your task from kickoff through the production process and all the way to the stamp of approval. If you’ve ever used a workflow diagram like a Kanban board to manage your workflow, you’ll be used to viewing these stages as separate columns that your tasks move between.
Workflows can be as simple as Request → Production → Delivery or they can be complex, with multiple business processes, teams, and stages of approval in play.
But, essentially, every workflow has a beginning, a middle, and an end. At every stage of the workflow, the person responsible for the task plays a role in moving it closer to the final stage. And in countless cases, you’ll find opportunities for workflow management software to lighten the load.
Step 1: Input
Whether you see the first step in your workflow as a planning phase, an intake process, or a formal project kickoff, everything starts with defining the input. This is the material your team will transform as it moves through the workflow.
During the first stage of the workflow, your team will take a new, probably repeatable task and plan their approach. For example, a creative and design team asked to deliver the assets for a new product launch campaign might:
- Break a larger task into subtasks that are easier to plan for and delegate. For example, designing an entire website is a monolithic job, but planning to tackle each page or section of the site separately makes this part of the project feel much more approachable.
- Decide on a realistic duration and set due dates to create a project timeline that suits the team working on the assets and the people who requested them.
- Gather the resources they need to start work, like creative briefs, essential files, and tools. To return to the product launch campaign example, this could include market research data, access to professional photographers or videographers, and precise information about the product from the development team.
- Delegate the task to the team members with the skills and capacity to complete it to a high standard. This can also include defining the people who are ultimately responsible for the task as it moves through the production and approval stages.
Even at the very beginning of a workflow, there are some potential pitfalls for managers to avoid. For example:
- Incomplete information can lead to confusion when starting a new task and a delay that starts the workflow off on the wrong foot.
- Information silos can mean your team wastes time and effort looking for information that another department is holding.
- Repetitive tasks — especially manual, time-consuming jobs like data input — can stand in the way of tasks that demand more creative energy.
Being aware of — and planning for — these issues in advance can mitigate the risks and help you create a workflow that’s flexible enough to adjust if you need to. This is where workflow management software, like the workflow features included in Wrike, can streamline your process and set you up for success.
To support your team at the beginning of each new task, Wrike includes:
Automatic notifications
When you manage your workflows within Wrike, you can set up automatic notifications for your team so they know exactly when their attention or input is needed.
Depending on the task, you can create automations to notify a whole team, a job role, or an individual Wrike user.
For example, whenever you assign a new task to someone in your workspace, they’ll get a notification, and they’ll be able to quickly and easily open the task from their personal dashboard. Everyone is effortlessly kept in the loop, and workflow management becomes a much smoother experience.
Teams using Wrike find that notifications make collaboration easier, avoid confusion, and reduce the amount of internal emails they send. The team at Electrolux told us they send 50% fewer emails and spend 30% less time per project since they started using Wrike.
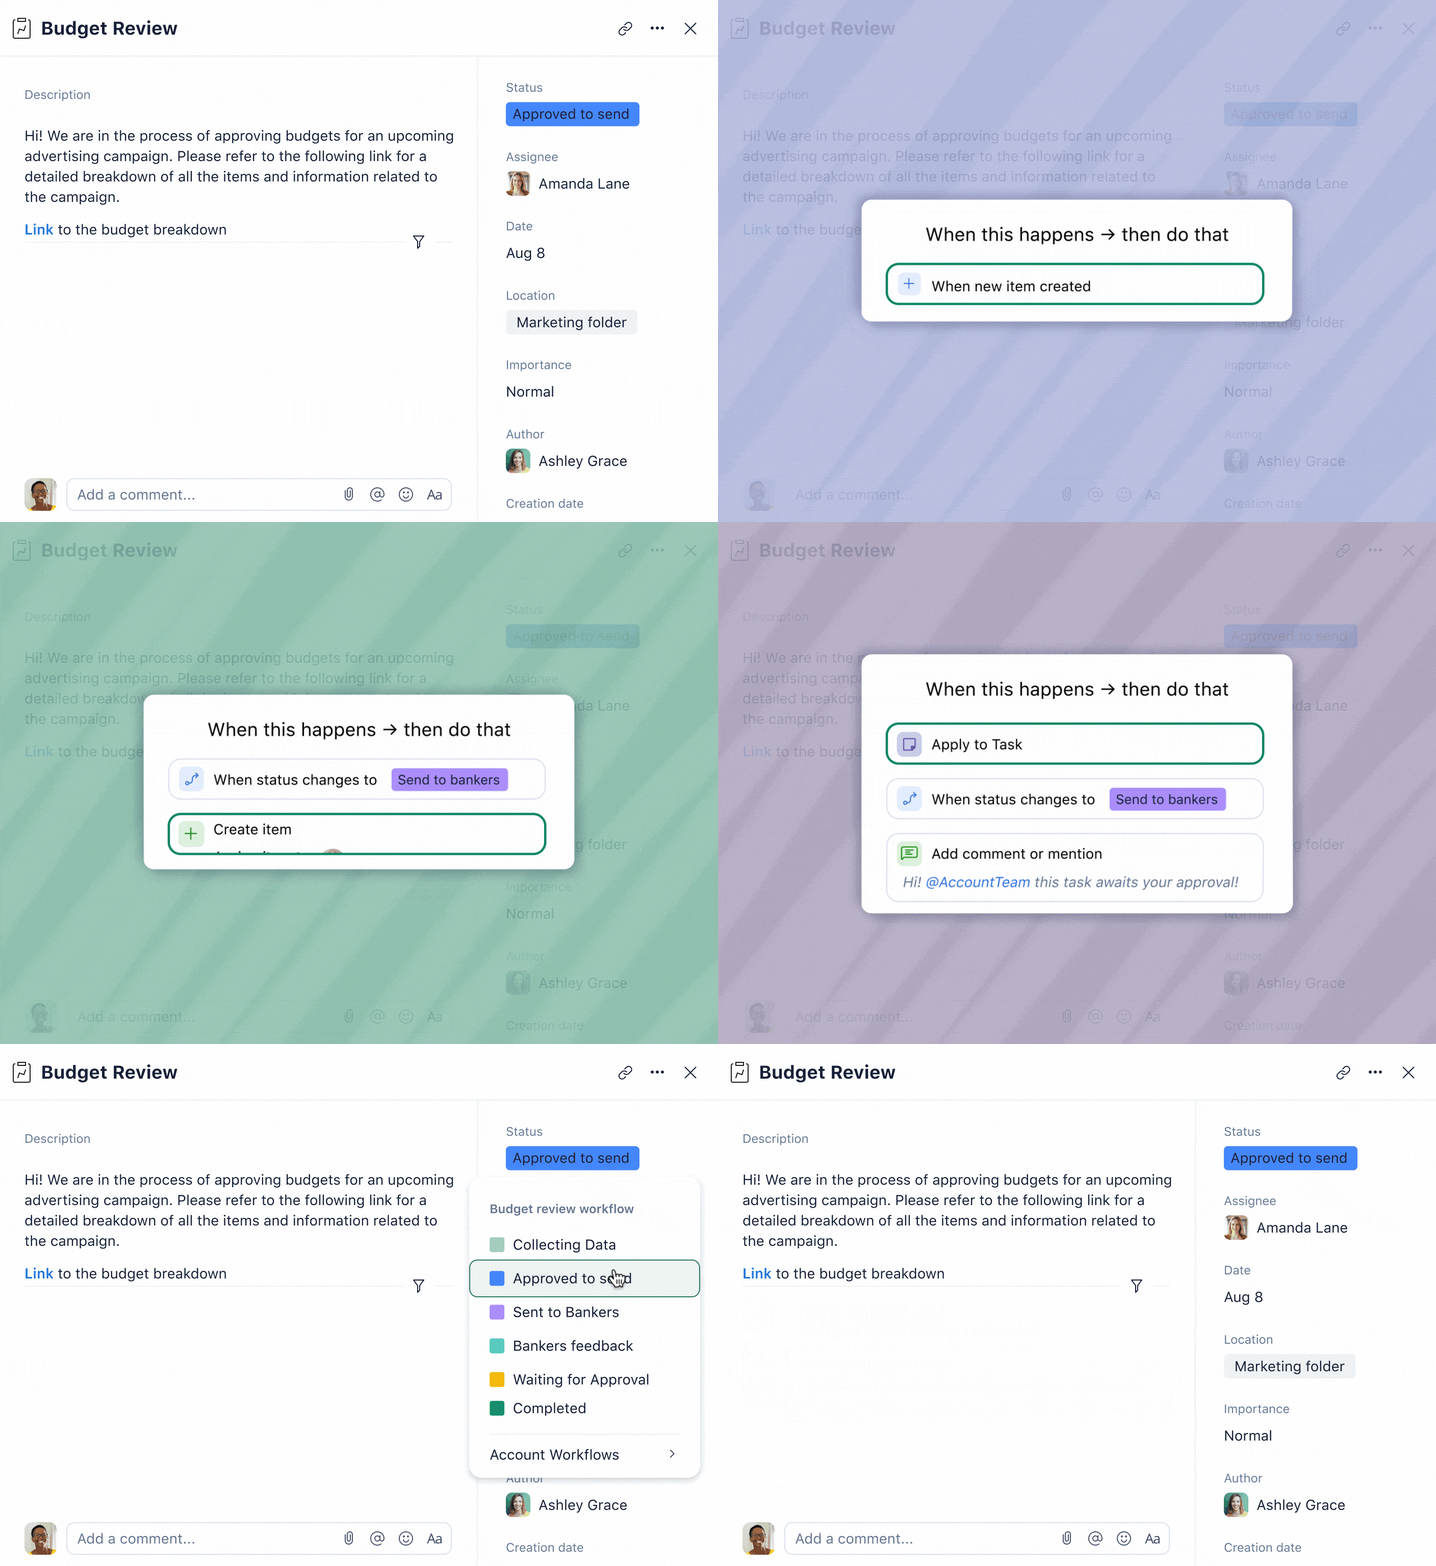
As your tasks move through your workflow, you’ll find automated notifications come in useful time and again. We’ll talk about this in more detail later as we showcase the best ways to request edits and approve tasks in your workflow.
Custom request forms
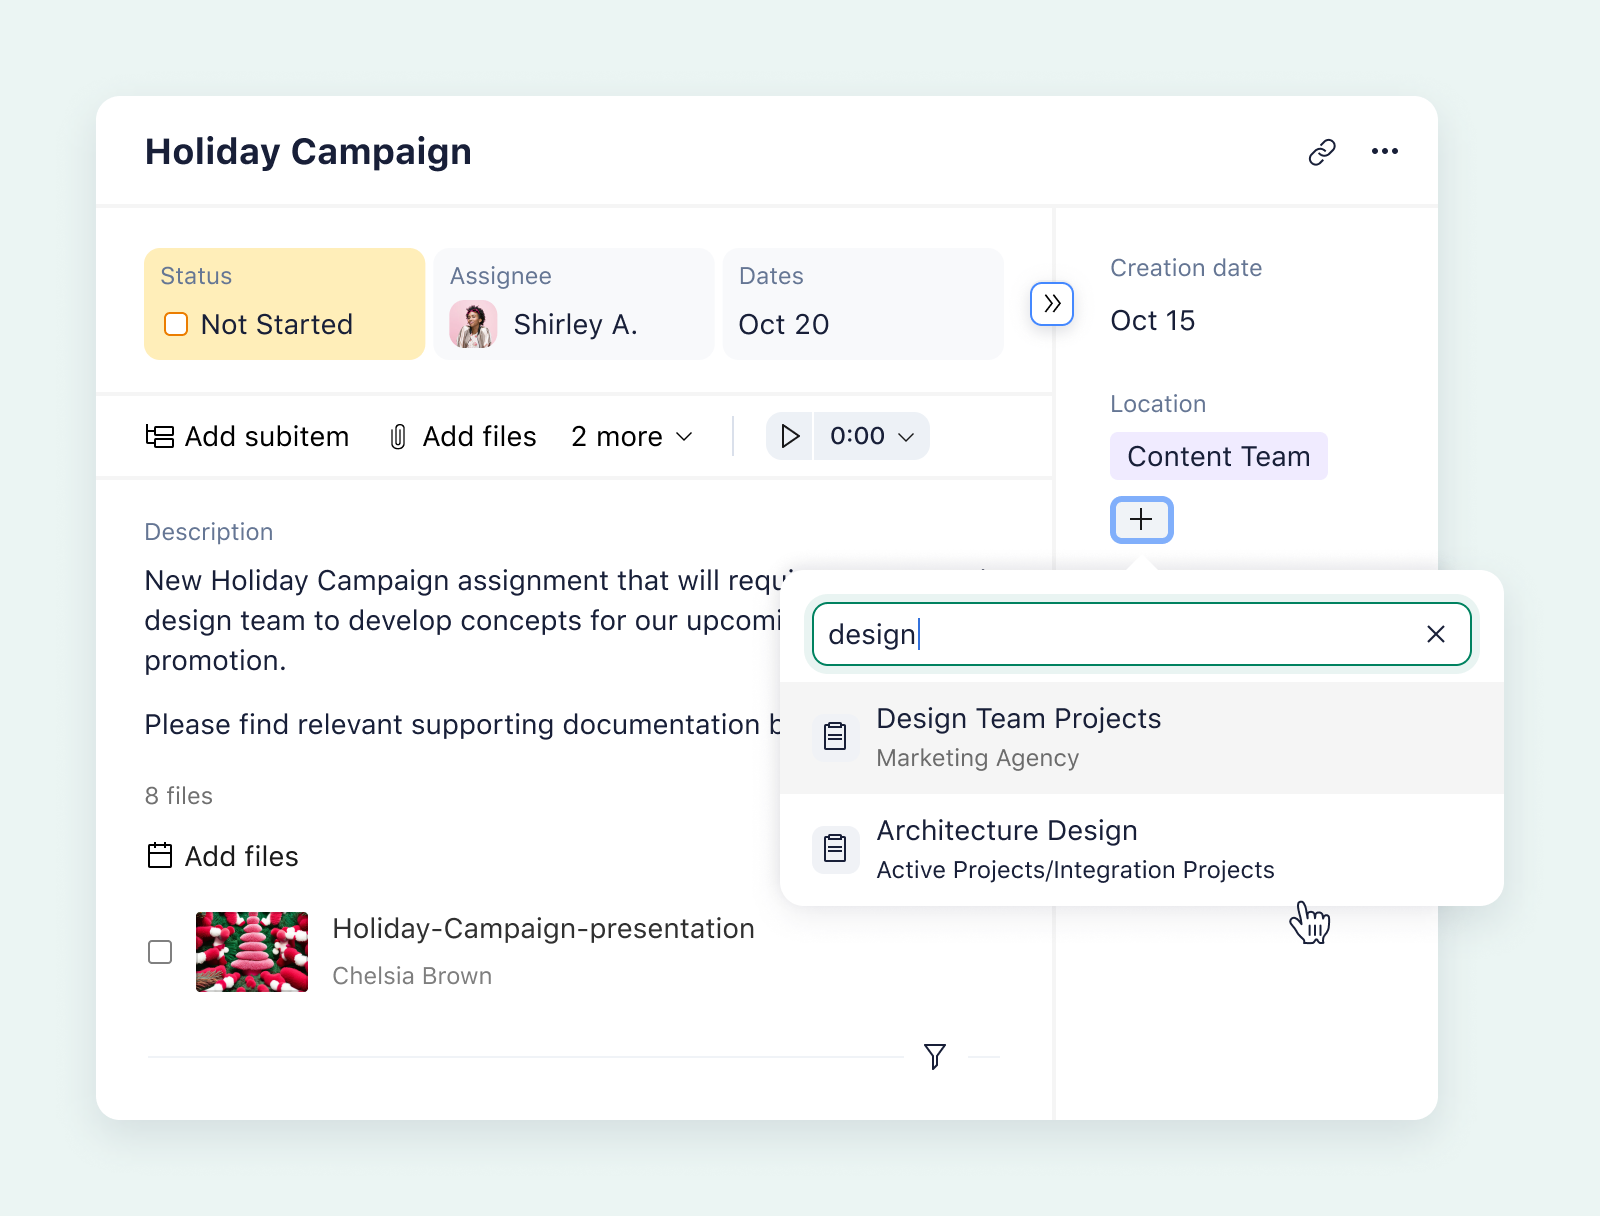
Wrike’s custom request forms revolutionize the way you approach task intake. This is the easiest way to make sure you have the resources you need to get straight to work, every time you get a new request.
When you create a dynamic request form for a task your team regularly completes — for example, if your marketing team regularly creates targeted emails with other departments in your company — you can set up a form to gather essential information, like the campaign goals, the requested deadline, and the images they’d like to use.
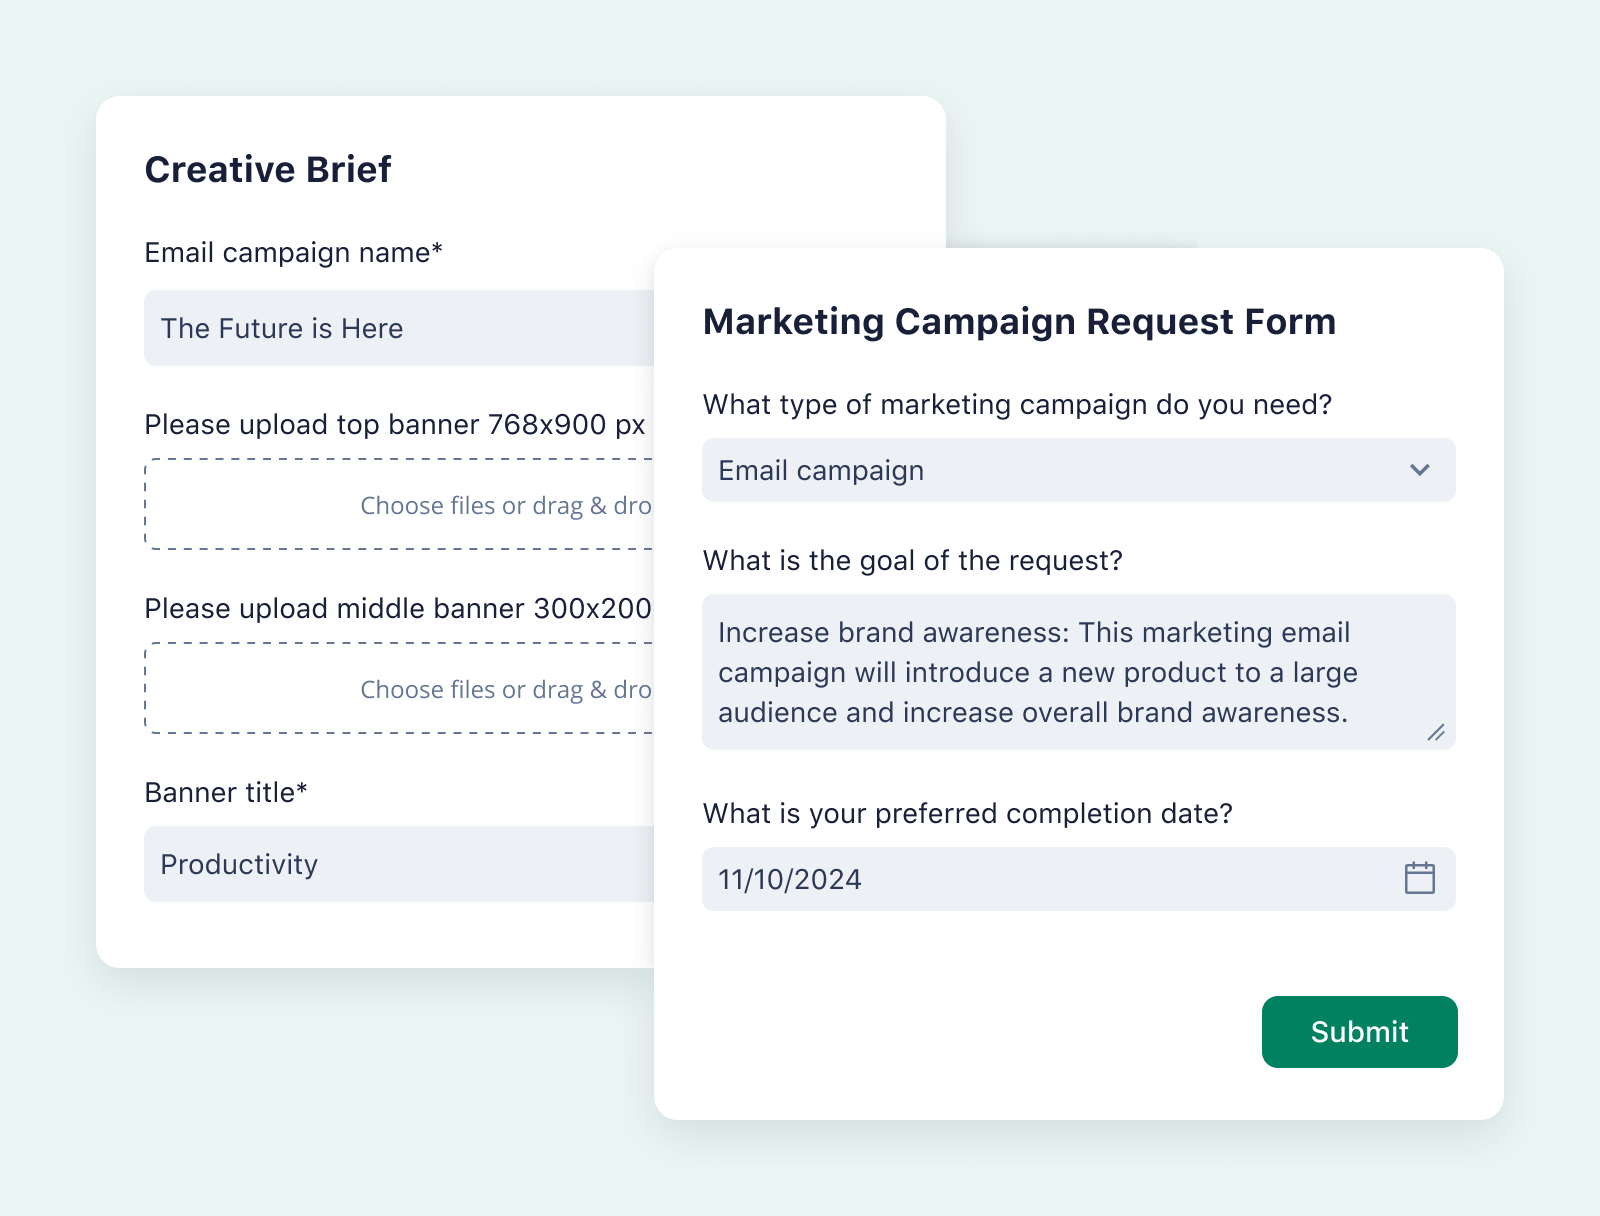
Plus, Wrike’s request forms can set up a task and kick off a workflow automatically.
By building simple process automations into your request forms, each new request can trigger the creation of a new project with a fixed workflow and even assign individual tasks to the appropriate team, so you don’t waste any time getting started.
Multiple workflow visualizations
When you track your work in Wrike, all the data on your tasks, their assignees, and their progress through your workflow is centralized. While spreadsheets or basic task management tools can display a snapshot of your workflow, Wrike pulls from this central source of truth to visualize your workflow in real time and from multiple different angles, including:
- Kanban boards to show the number of tasks at each stage of the workflow
- Gantt charts to visualize your timeline and task dependencies more effectively than a traditional project flowchart
- Table view to show task status, assignee, and key dates on one screen
- Calendars to plan your team’s schedule effectively
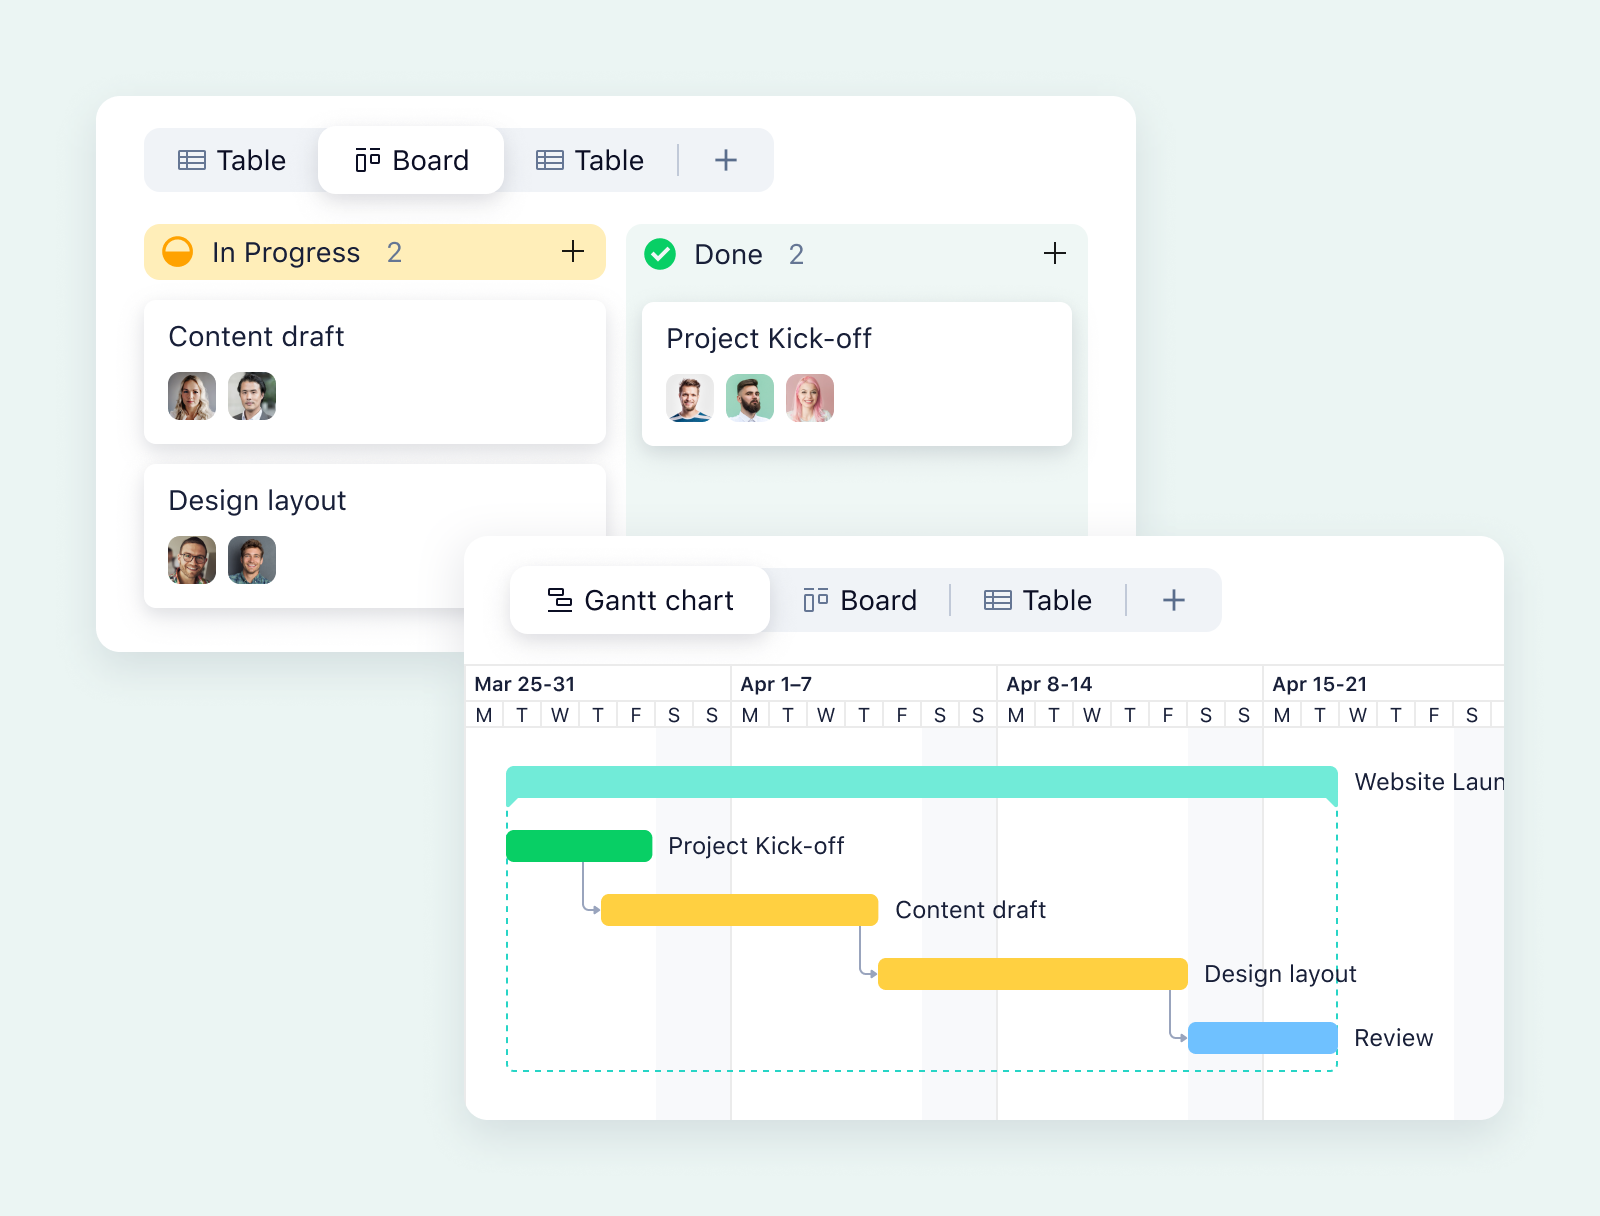
You can add several different views to your Wrike workspace, depending on what your team prefers. As you switch between workflow views, you’ll find all the details you need to inform your decision making.
We think Walmart Canada put it best.

Having that visibility within Wrike of the entire pipeline in one place, with real-time data that’s consistently there, is one of the biggest benefits and something we’ve never had before.
Carolyn Lum, Senior Manager of Continuous Improvement
They’re now enjoying fewer and shorter status update calls and instant project approval too.
Step 2: Production
Once you’ve started the new task in your workflow, the central stages transform the input into the requested output. This process will be unique to the team and the tasks you regularly complete.
For example, at one company, developers might have a sequential workflow in place for bug reporting, tackling one task after another. They might find themselves routing reports to different technicians responsible for identifying, documenting, and resolving the issues.
On the other hand, a design team might set up a parallel workflow, where they work on different aspects of the project simultaneously because the individual assets don’t need to be completed in a set order.
Meanwhile, the company’s HR team will likely follow a rules-driven workflow during hiring and employee onboarding because they have to complete fixed workflow processes to make sure each new hire is dealt with compliantly.
However, regardless of the different types of workflows, their complexity, and the specific tasks, the potential pitfalls are similar.
- Bottlenecks can form in the workflow whenever there are delays, unforeseen circumstances, or inefficiencies in the way resources have been allocated.
- Unassigned tasks can mean steps are missed out or tasks are overlooked until the last minute, when they can completely derail your workflow.
To keep your process brief and on schedule, Wrike includes features like:
Capacity tracking
When you use Wrike as your project management tool, you can use our capacity planning features to help you accurately assess your team’s workload and meet your deadlines.
A detailed, individualized view of your team’s bandwidth can help schedule tasks in a way that works for everyone, making your working days more productive.
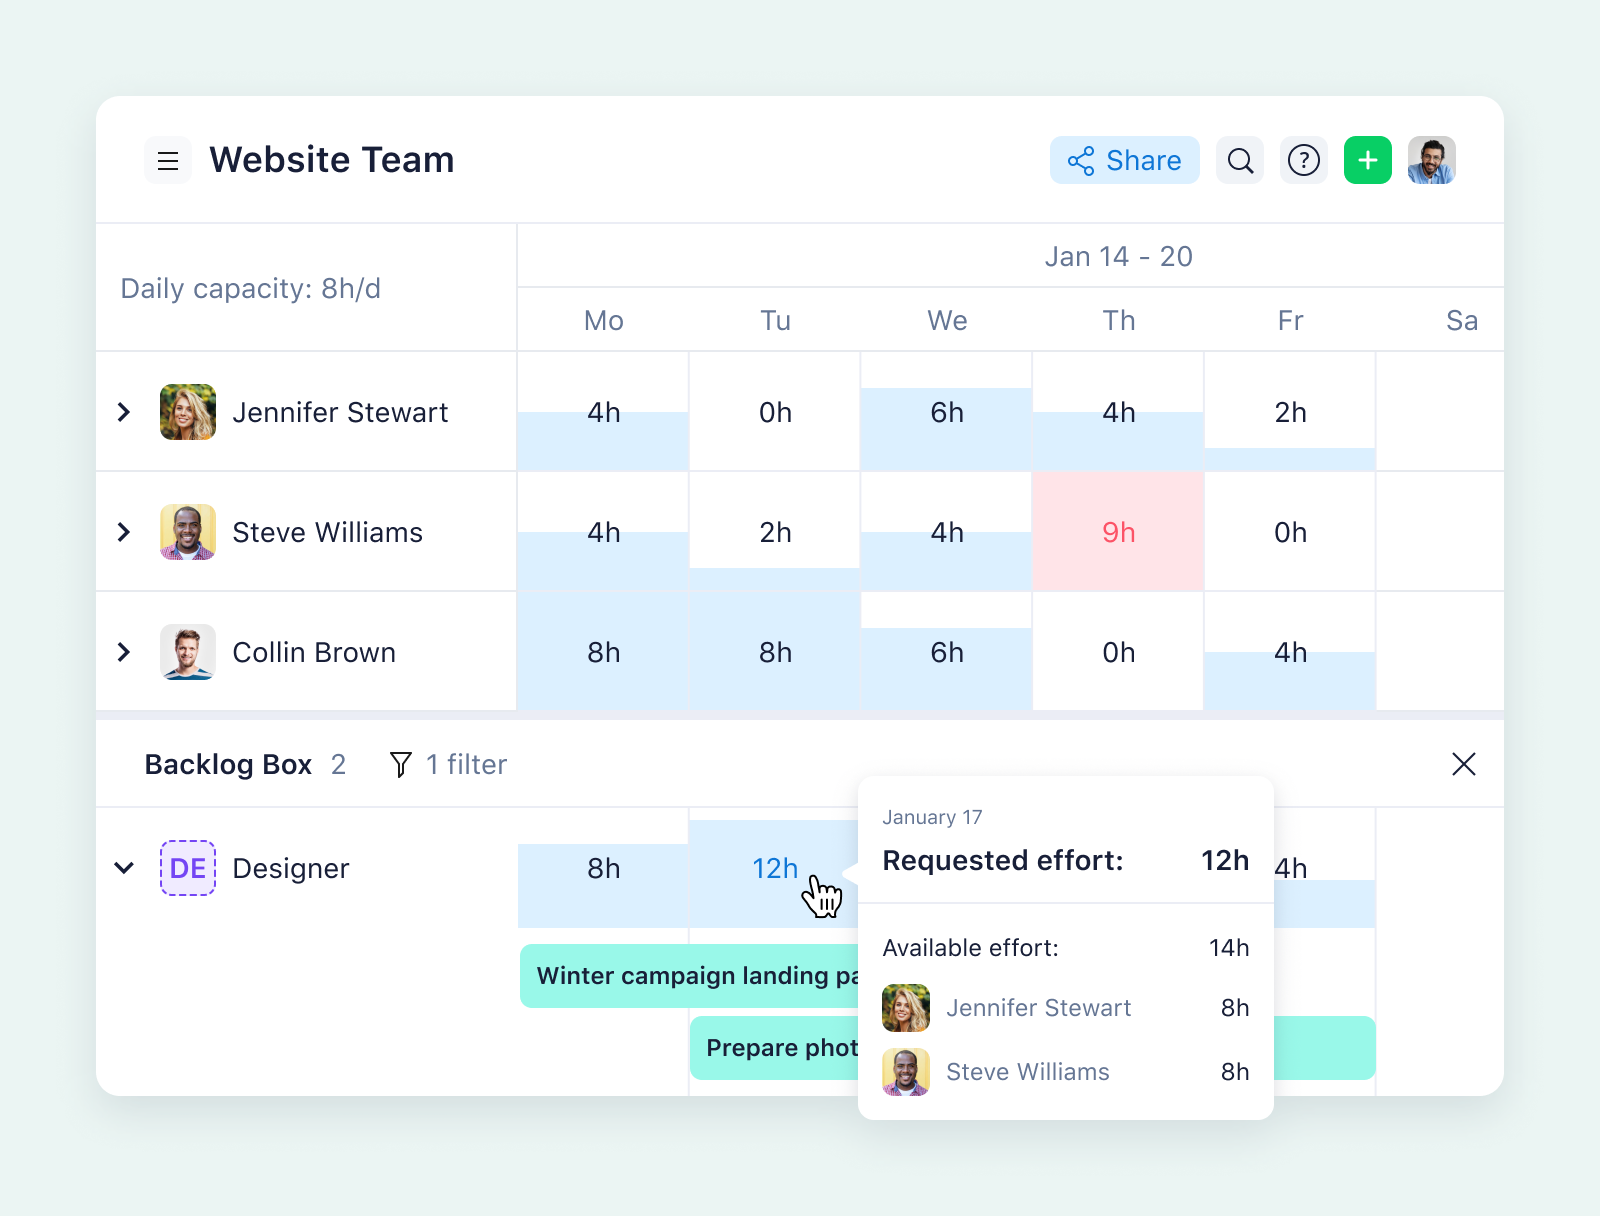
Plus, for managers, this workload visibility can identify the team members available to complete new tasks, assess their individual workload in detail, and identify people who are overloaded or at risk of burnout.
In the same screen where you view capacity, you can see and delegate unassigned tasks. You’ll also be able to reassign tasks from team members with too much on their plates to those with more bandwidth with a simple drag and drop.
Workload view is a standout feature for the team at Hootsuite. The company’s marketing and creative departments focus on customers across 175 different countries.
The workload view makes me better at my job because I can see exactly what every person on my team is working on. And then from there, I can figure out whether they have bandwidth to take on more projects or whether they’re at capacity.
Emilie Vachon, Lifecycle Marketing Coordinator
Our Work Intelligence® features are now available to all users and include advanced risk prediction.
With Wrike’s AI, you can stay alert to at-risk projects. Based on data like your set dates, your past tasks, and your team’s performance, machine learning predicts project delays. Our software automatically notifies team leaders when a project is at risk of delays so they can take action to mitigate the effects.
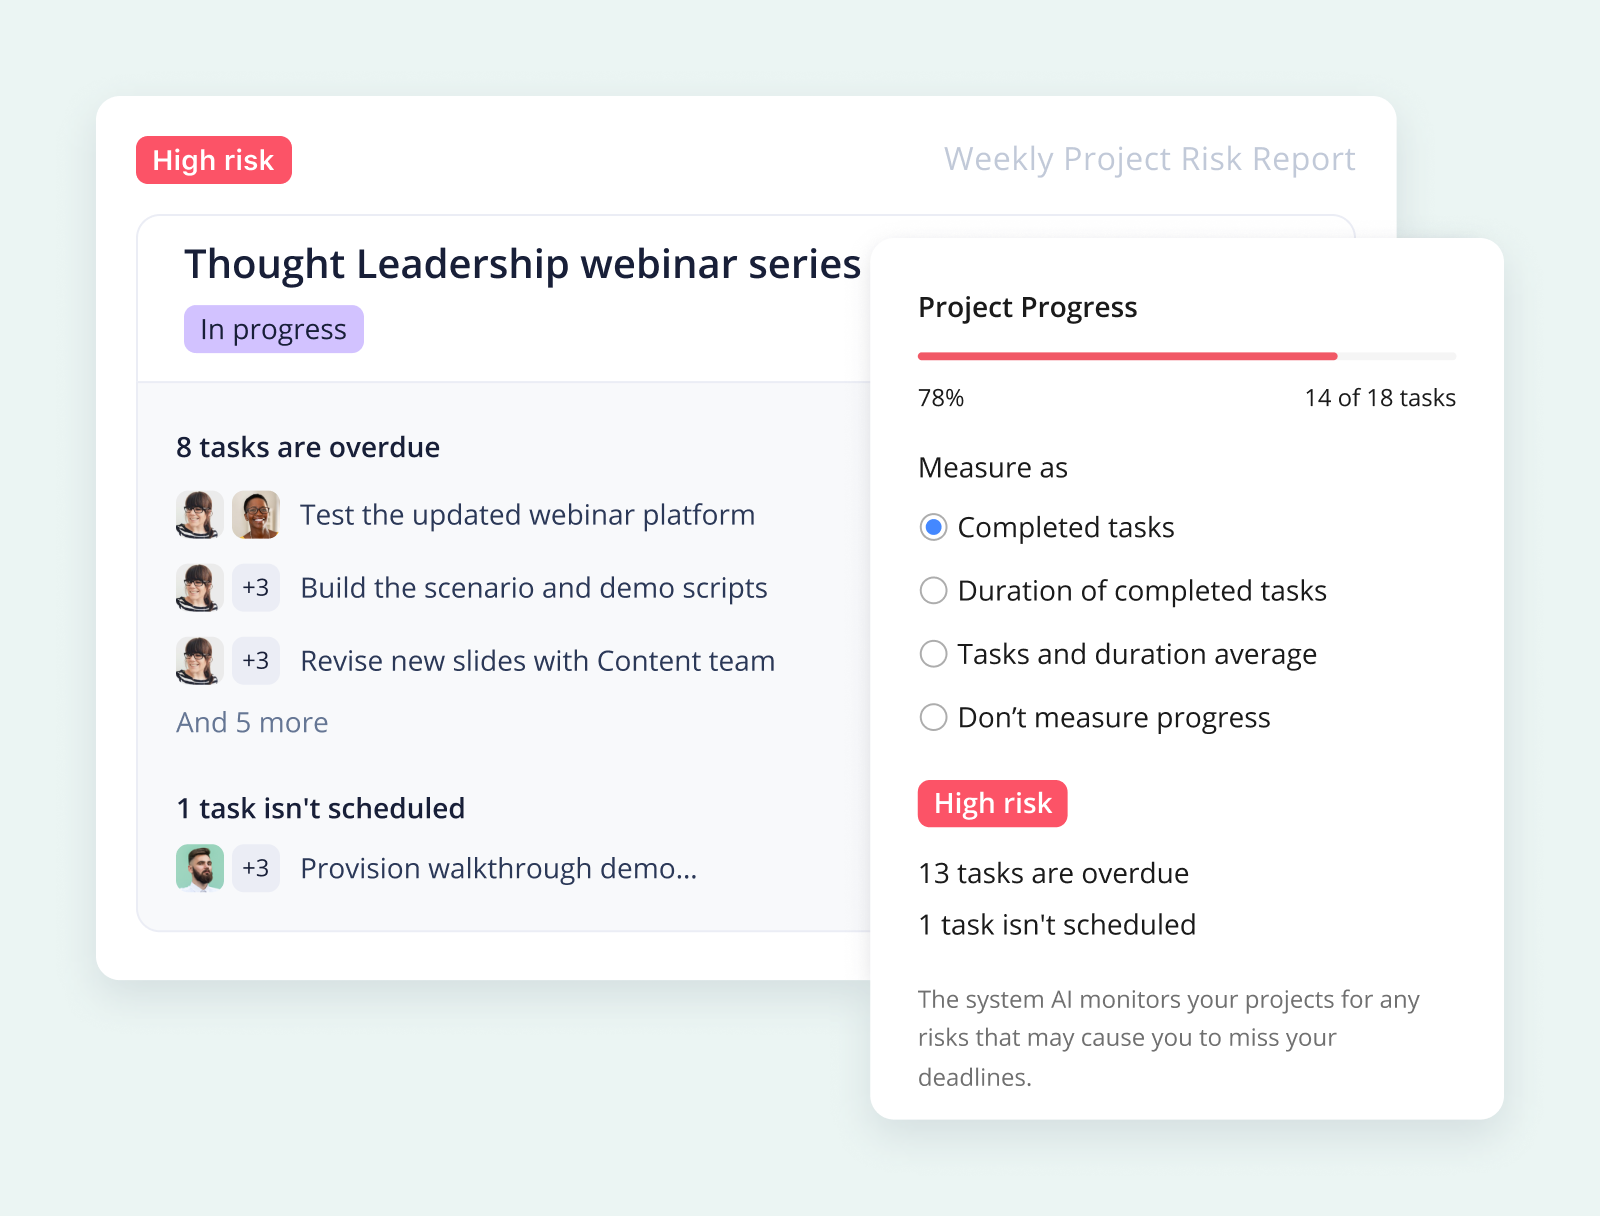
As soon as you get a notification about a potential risk, you’ll be able to pull up the task, drill down into the progress data, and swiftly begin a discussion with the team members involved so you can avoid a missed deadline.
With this robust safety net in place, your process becomes infinitely more scalable, so you can take on more complex tasks with confidence.
Discussion and collaboration
When you streamline workflows at your company, you remove friction from your processes and open up space for your team to focus on new ideas and approaches.
One of the best ways to encourage this collaborative energy is to make it easier to discuss your shared tasks and outputs. That’s why Wrike attaches the discussion of the assets you’re producing to the files themselves.

The days of “Which version are you on?” are over. In Wrike, your team can comment on files directly, proof changes in real time, and cut out email chains that create barriers in your workflow.
Instead of opening a new image in Photoshop while reading an email with a list of feedback, for example, you can comment on the file, compare versions, and make the changes without leaving Wrike. You eliminate issues with file versioning and, with our automated notifications, you can get responses and action changes quickly and efficiently.
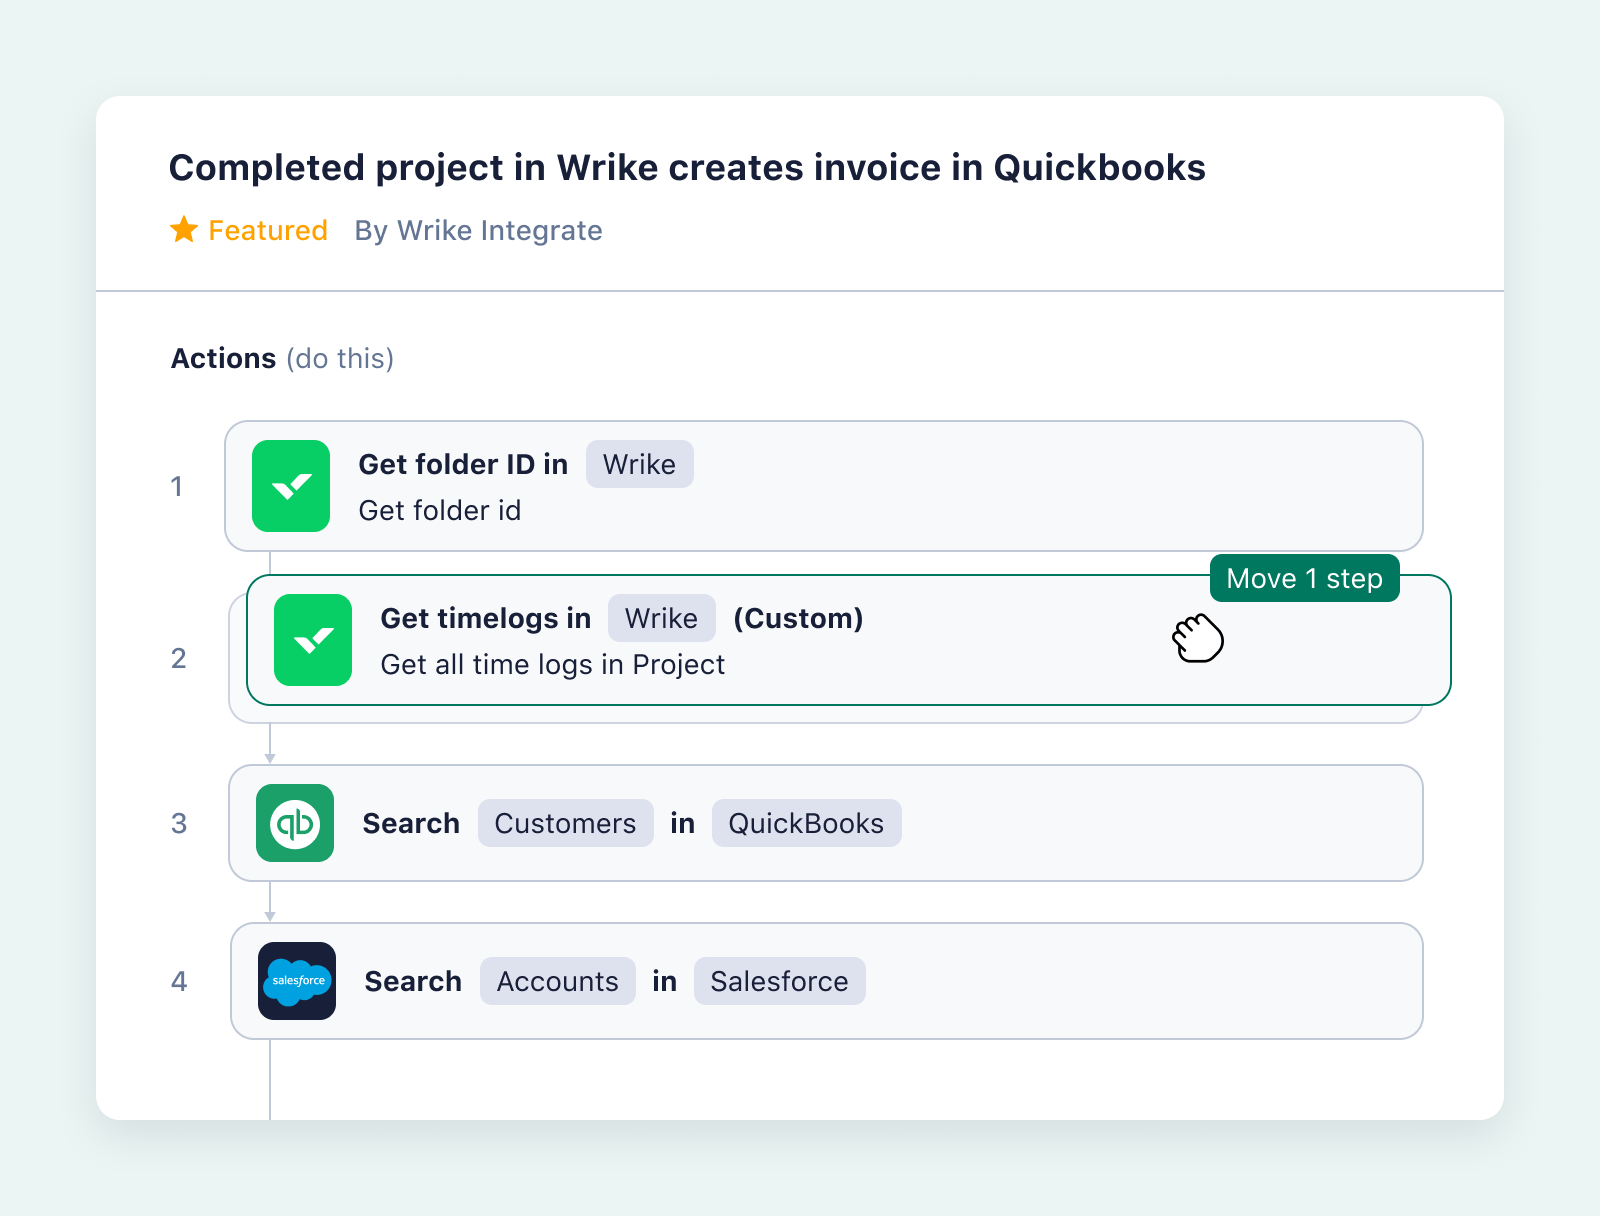
Alongside Adobe Creative Cloud, Wrike includes integrations with more than 400 popular apps — from email notifications in Microsoft Outlook, to Slack, QuickBooks, and Salesforce — so you can create a no-code workflow that brings in all the tools you need.
Step 3: Output
As well as being a way to boost productivity by making your process more efficient, fixed workflows make sure the assets you’re producing meet the highest standards every time. This is why the review and approval stages of your workflow are so important.
Just like your production process, the end stages of your workflow will be unique to your team. Internal teams may simply email a document to another department when they’ve finished working on it. In contrast, professional services providers and agencies working with external clients might have to put their work through multiple rounds of proofing, feedback, and approvals before it can be published.
And, although it’s easy to overlook, an essential task at this final stage is to evaluate your workflow, so you can repeat what worked, adjust what didn’t, and communicate any changes to your team.
Without a proper workflow management solution at this critical stage, you run the risk of:
- Unclear approval authority, which can cause delays and a lack of accountability
- Multiple rounds of requested changes, which can postpone the end of a project, add stress, and become complicated to implement and track
- A lack of formal feedback, which leads to mistakes being repeated on the next task that passes through the workflow
When you choose a workflow management tool like Wrike, you bypass all these potential issues from the outset. You can quickly and easily sign off on the outputs at the end of your workflow, and you’ll have all the tools you need to refine the way you manage your workflow based on concrete data and feedback from your team.
Custom approval statuses
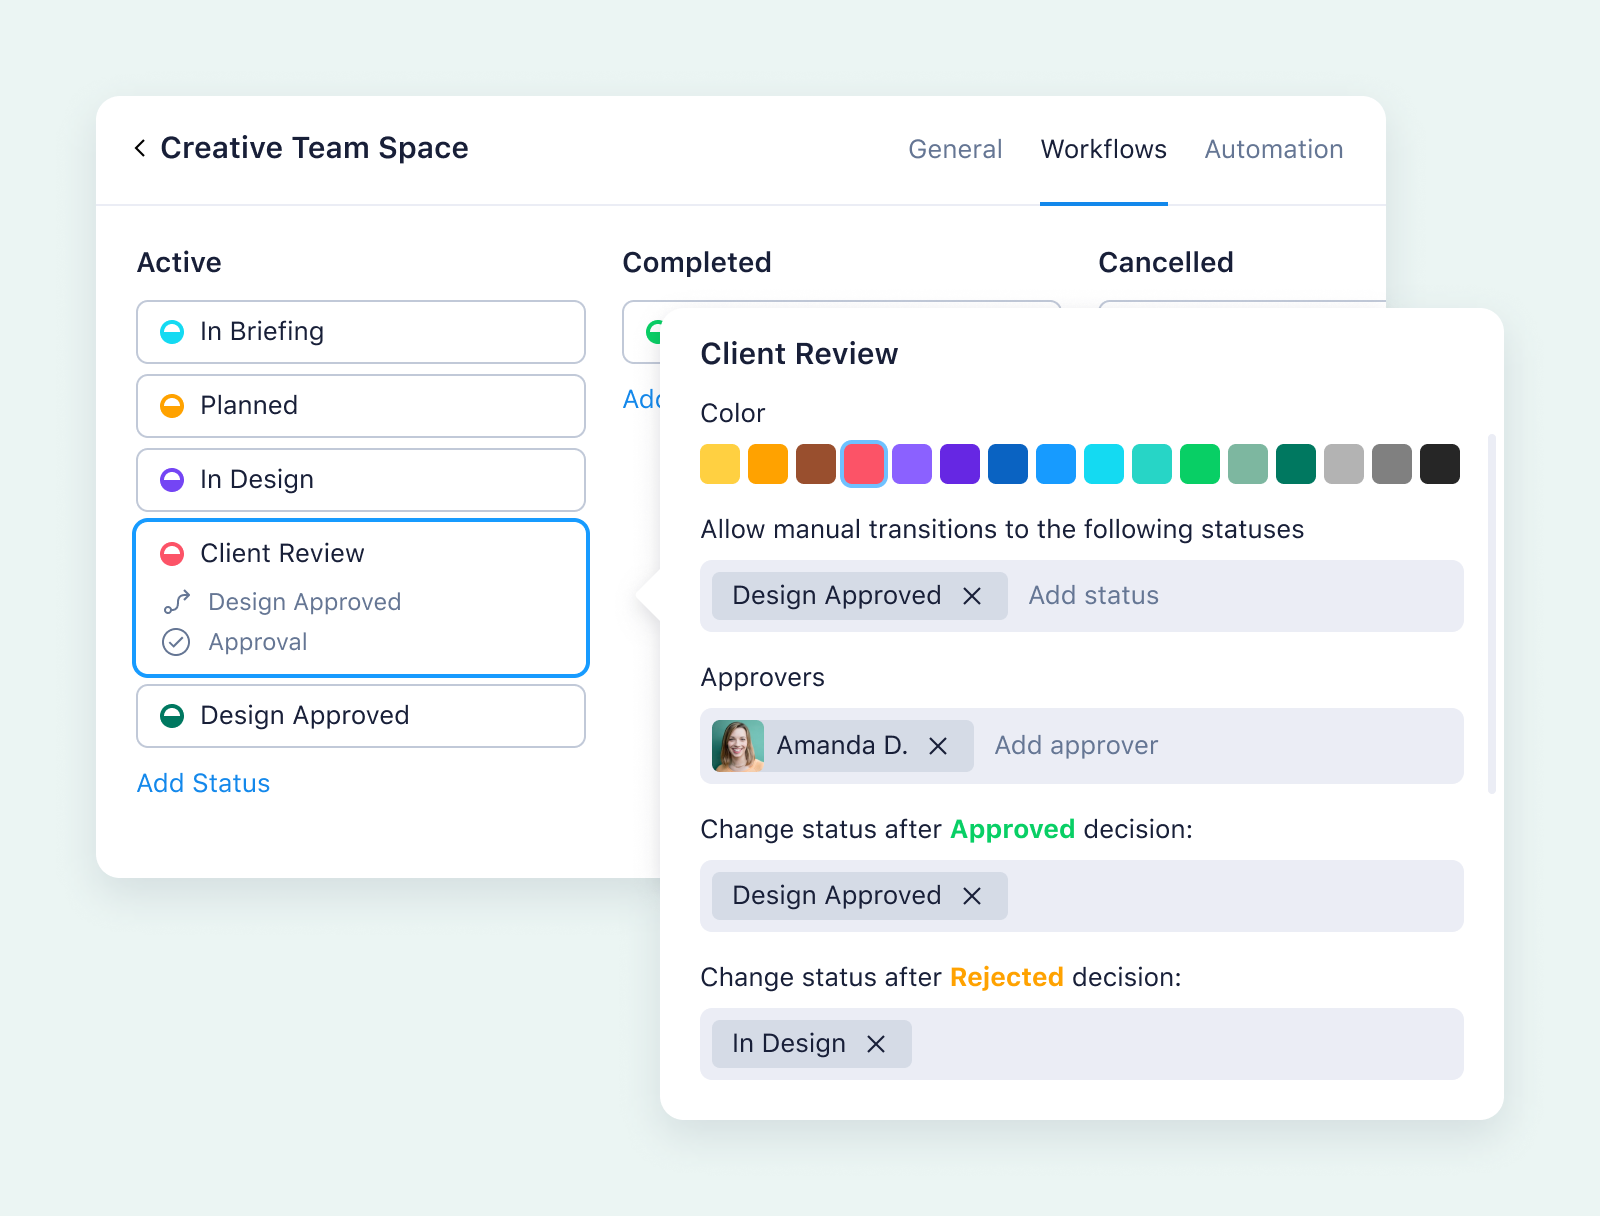
When you work in Wrike, each step in your workflow is represented by a task status, which you can name and color code to build an approval workflow system that makes sense for your team.
While you’re creating custom statuses for your tasks, you can also create custom approval statuses that name the job role or even the individual who’s responsible for giving the final stamp of approval.
Custom approver statuses make it even less likely that you’ll overlook a task you’re completing in Wrike. For example, if you designate Amanda as an approver rather than simply “Design Team,” you can be sure the asset will land in her dashboard, where she can review the work immediately.
Tracked task history
When you create a task in Wrike, you can track its history, access the files associated with the work, and see who’s had a hand in all the changes that have been made.
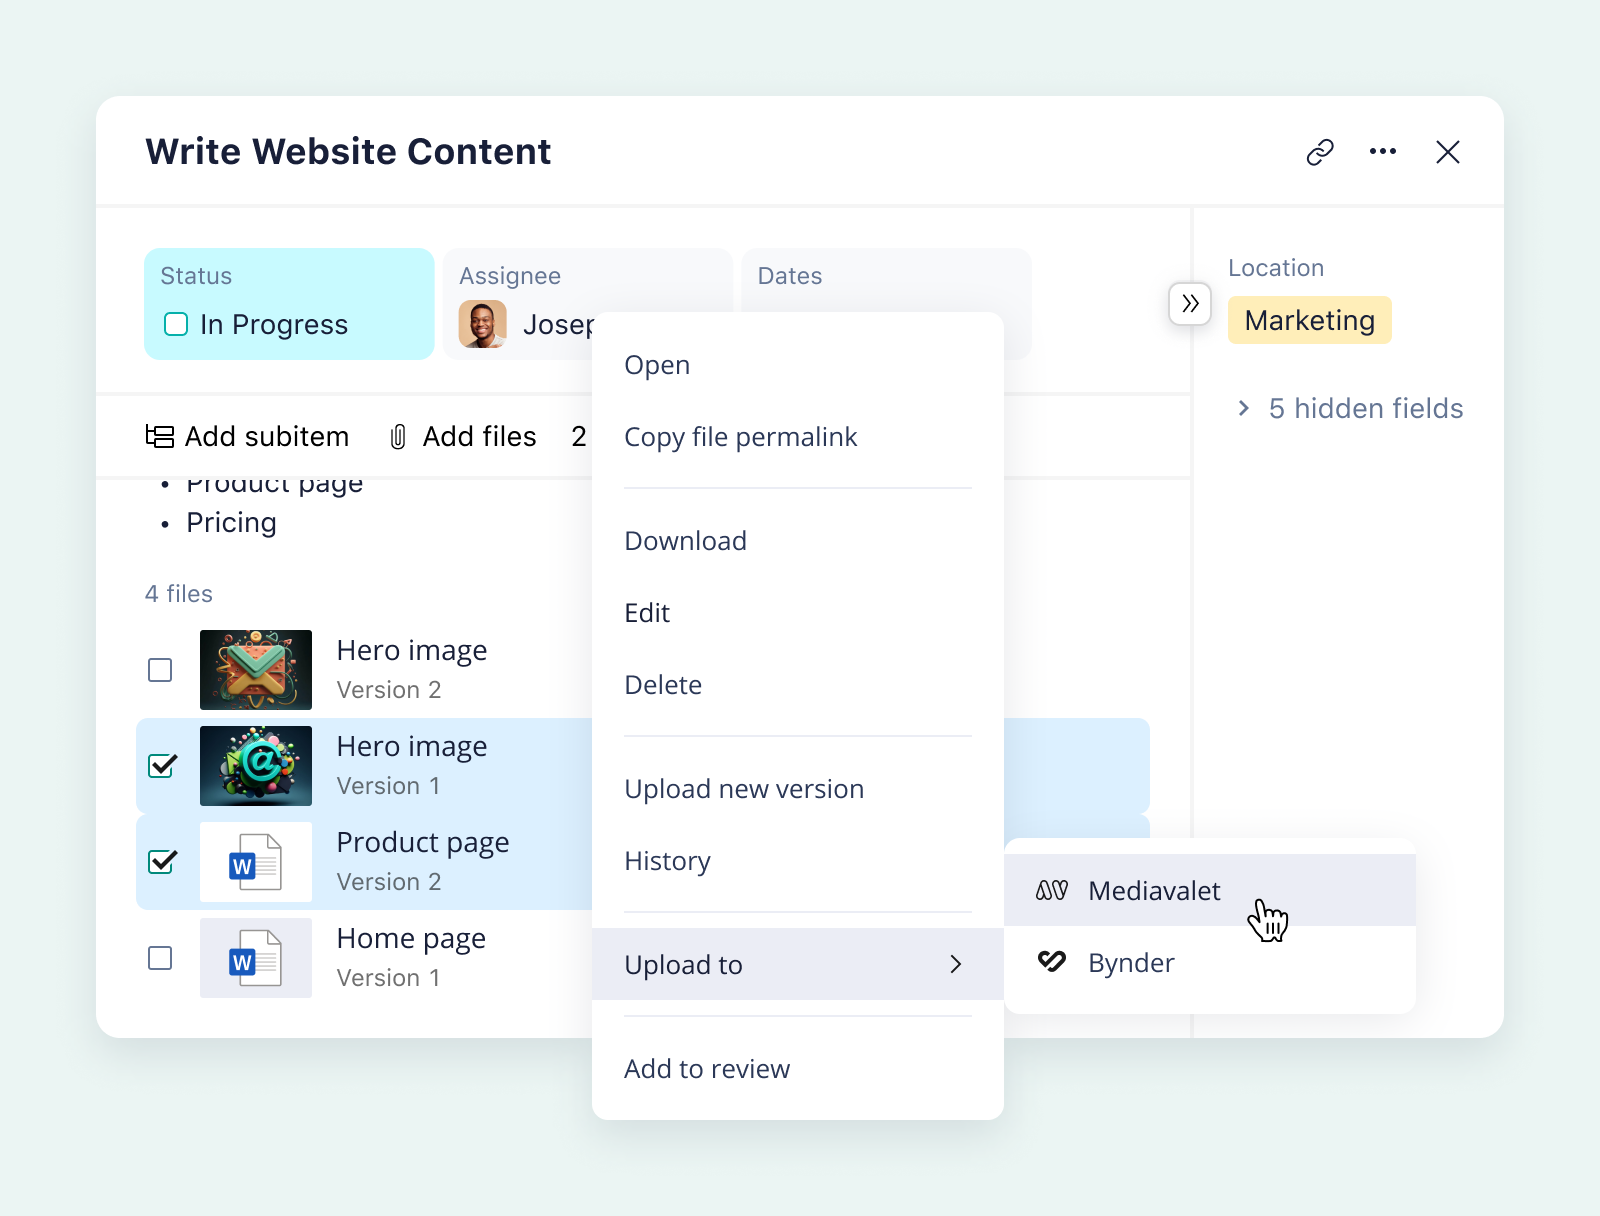
This makes it easy to pull up the information you need if you want to do a compliance audit at a later date, or if one of your stakeholders pushes back against the work you’ve produced.
As well as ensuring compliance, the task history creates the transparency necessary for collaborative work.
Everyone can view the stream of updates relating to the task and view the details of the decisions that were taken. When these details are easy to find (and learn from), it’s easier for everyone to give their feedback and participate in the final job in the workflow: evaluation.
Reporting features
The most effective teams gather data on their workflows on an ongoing basis — for example, with weekly reports on capacity and the number of tasks at each stage — and at the end of a project.
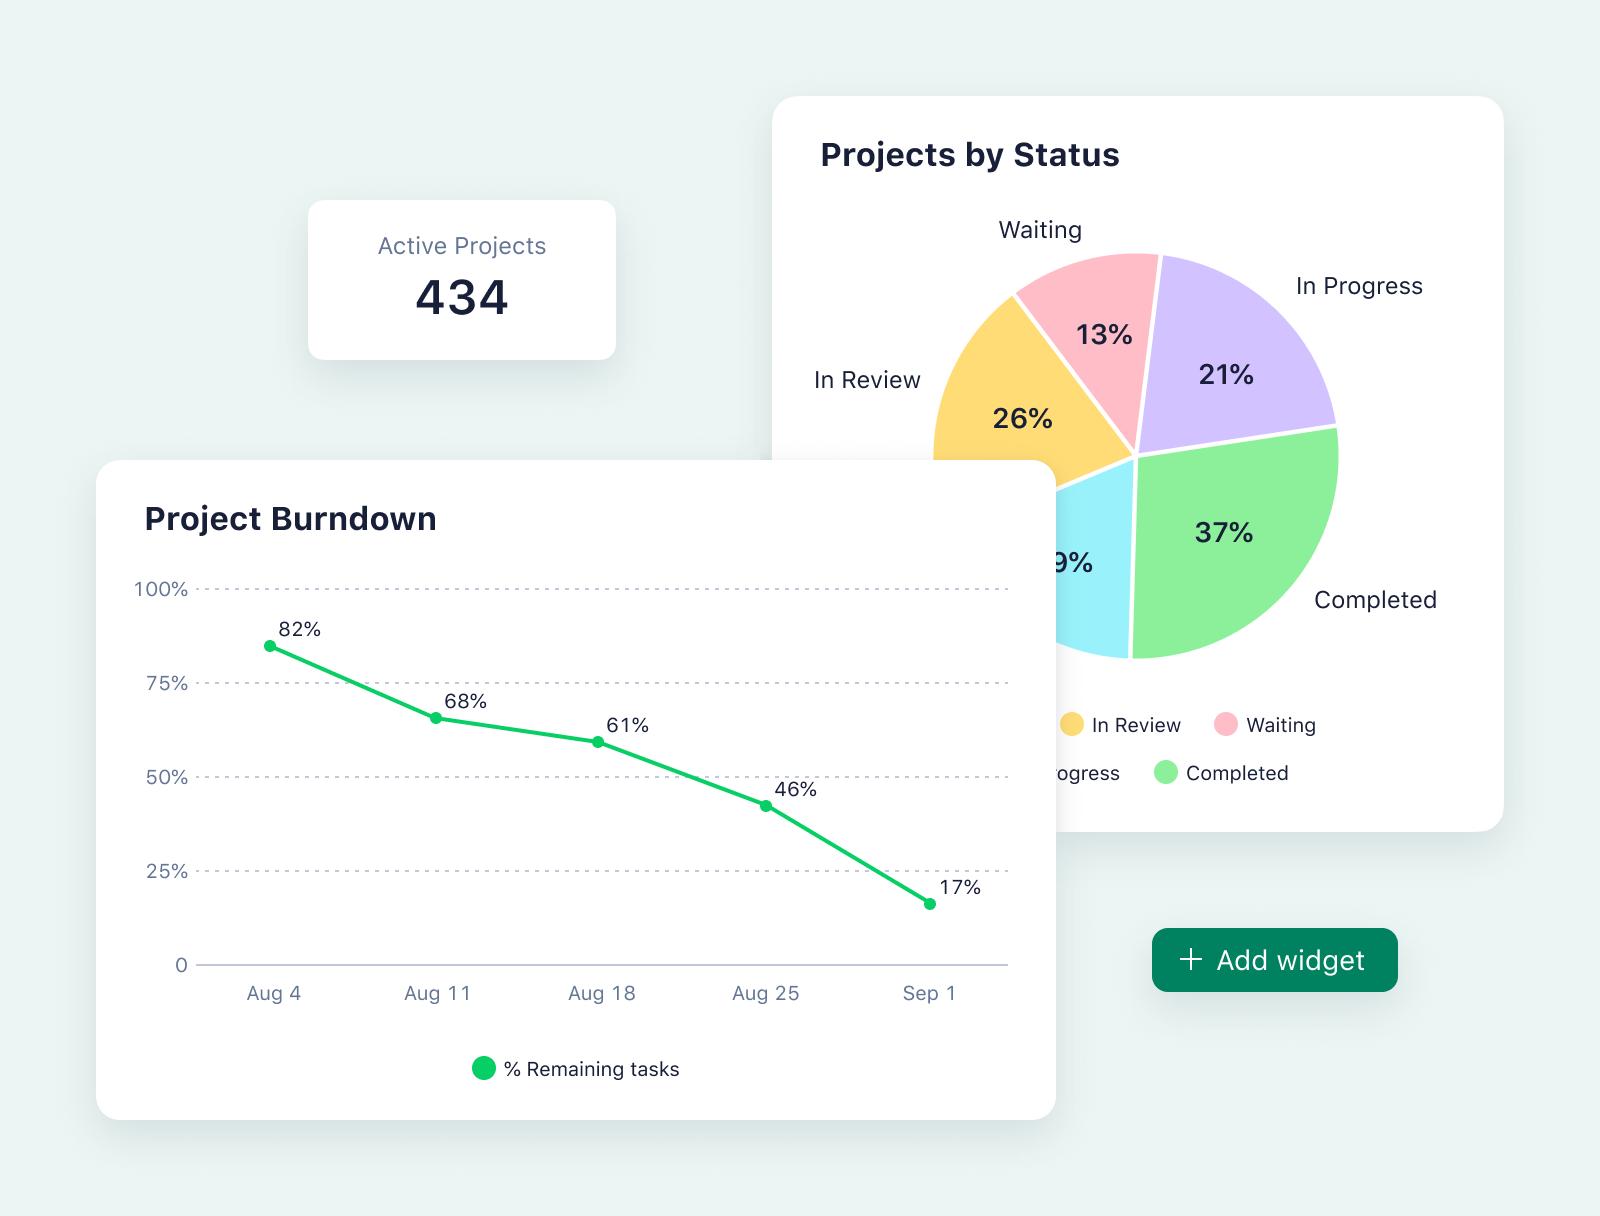
When all the details of your workflow are tracked in Wrike, you can instantly generate snapshots or reports about your task statuses, your time tracking, your team’s capacity, and countless other metrics that show you the best opportunities for workflow optimization.
For example, you can:
- Identify redundancies in the workflow — the steps, checks, or approval requests that could be removed to save time and energy
- Find the areas where your team is stretched thin so you can reassign tasks or bring more people into a certain area of work
- Identify the tasks that spent the most time at certain statuses, to pick out the jobs with the most rounds of edits and see what you can learn
- See how the hours you planned stack up against your billable hours so you can quote more accurately for future projects
To sum up, if you’re overlooking tasks, if bottlenecks appear without warning, or if you need to track your assets in more detail, it’s time to implement workflow management software.
With a work management tool like Wrike, you gain:
- Total clarification of roles and responsibilities at every stage of the workflow
- Instant communications with everyone in your team, from automatic task assignment to status update notifications to tagged edit and approval requests
- A bird’s-eye view of your projects, combined with easy access to the granular detail of all the tasks you complete
- Risk management features, including tools to help you identify the members of your team who need more input or support
- Robust reporting to inform your decision making and help you hone your process
Project management in Wrike: Even more features for teams and managers
Workflow management and automation are some of Wrike’s most powerful features, and it’s all because of the way we centralize your project progress data and set your team up for frictionless communication.
When you manage your tasks and workflows in Wrike, you can take advantage of countless other award-winning project management features that level up your work — both the day-to-day tasks that keep your business running and the new projects that need all hands on deck.
Book a demo and find out more about:
- Project and individual dashboards: In Wrike, teams can build their own dashboards, including private dashboards for individuals, to visualize the project in a way that helps them achieve their goals.
- Templates: Wrike’s tried-and-tested templates help you save time by simplifying complex projects and making it faster to start repeatable tasks. The templates library includes resources for different industries, processes, and project management styles.
- Resource management: Our innovative workspace tools, including project folders and cross-tagging, eliminate information silos and issues with file versioning, helping your team stay connected.
The most effective workflow management happens in Wrike
Workflow management doesn’t need to be complicated, but it’s essential to find a system robust enough to handle all your tasks.
Wrike puts all the data you need to effectively delegate your tasks, ensure the proper approval checks are being made, and identify areas for improvement at your fingertips. Even better, you’ll have all the seamless notification features you need to communicate the latest information to your team.
And what about those repetitive tasks that eat up hours of your week? Wrike helps you automate these tasks so you can spend more time doing impactful work.
With Wrike, every stage of your workflow is simplified, so you can work efficiently, collaboratively, and consistently. Sign up for a free trial to get started today.


